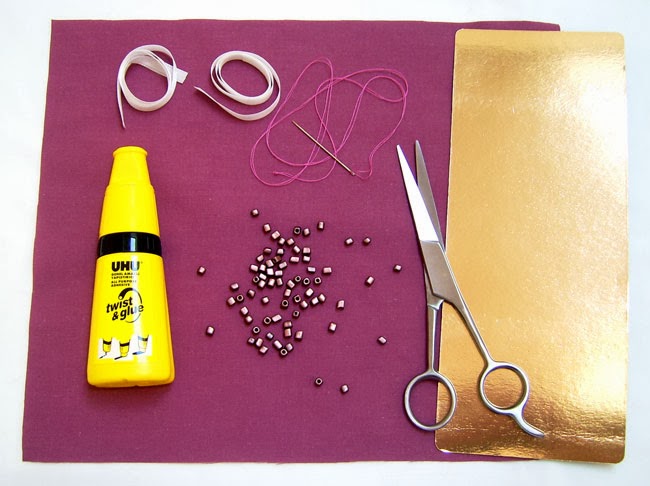
You will need:
- fabric in your favorite color - 23 x 28 cm
- ribbon - 2 pieces of 35 cm length
- all purpose adhesive
- beads - 74 pieces
- needle and thread - in a similar color as the fabric
- scissors
- cardboard - 10 x 23 cm
- collar necklace pattern - print this one
Put the pattern on the piece of cardboard and make an outline with a marker pen, like this:

Then cut the cardboard following the line:
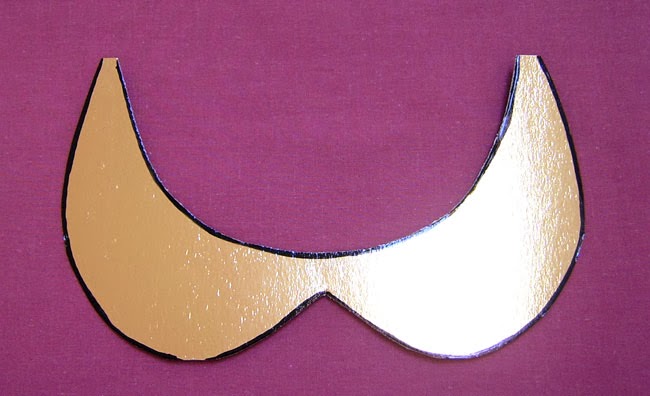
Place the pattern on the fabric and trace 2 shapes (with chalk):

Cut the first piece following the line and the second piece, outside the line leaving 1 cm distance.
You should end up with 3 pieces like this:

Place the cardboard on the big piece of fabric and glue the edges around. Work in small sections.
After you finish that step, glue the ribbons on each side. Place the smaller piece of fabric over and glue the edges on the inside.

Turn the collar necklace with the face up. Take half of beads and place them on one half of collar, just to make sure you will have evenly distributed beads.

Take a very soft pencil like an eye kohl, and make a dot under each bead. This way it will be easier to sew them at a constant distance.
Repeat this step for the other half of collar.
After those steps, you can sew the beads. Try to sew them in a way that you cannot see the thread.

...and voilà:
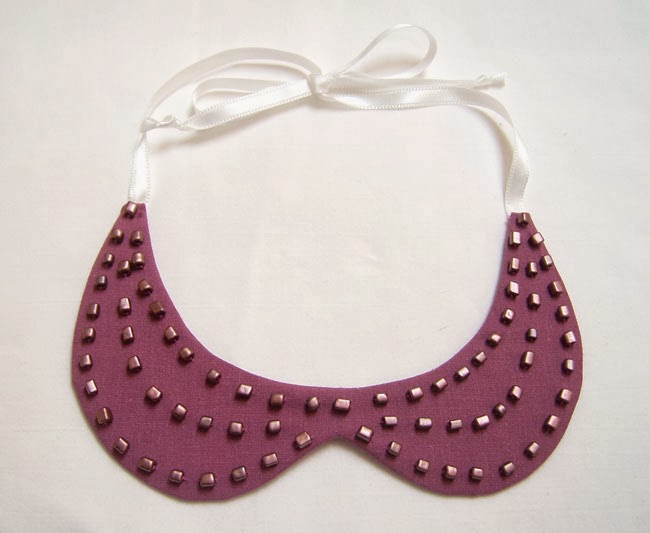
Other collar necklaces that I've made:

You can wear them to add a little color and texture to a plain outfit.

Put the pattern on the piece of cardboard and make an outline with a marker pen, like this:
Then cut the cardboard following the line:
Place the pattern on the fabric and trace 2 shapes (with chalk):
Cut the first piece following the line and the second piece, outside the line leaving 1 cm distance.
You should end up with 3 pieces like this:
Place the cardboard on the big piece of fabric and glue the edges around. Work in small sections.
After you finish that step, glue the ribbons on each side. Place the smaller piece of fabric over and glue the edges on the inside.
Turn the collar necklace with the face up. Take half of beads and place them on one half of collar, just to make sure you will have evenly distributed beads.
Take a very soft pencil like an eye kohl, and make a dot under each bead. This way it will be easier to sew them at a constant distance.
Repeat this step for the other half of collar.
After those steps, you can sew the beads. Try to sew them in a way that you cannot see the thread.
...and voilà:
Other collar necklaces that I've made:
You can wear them to add a little color and texture to a plain outfit.
If you liked this post, leave a comment
and follow me for more upcoming posts ;)

No comments:
Post a Comment